Congratulations on your Maestro Air Misting Fan. The box should contain the following items:
- Maestro Air Misting Fan unit.
- Base plate.
- Bag with 6x screws for attaching the base to the unit and 6x wheels.
- User guide.
Congratulations on your Maestro Air Misting Fan. The box should contain the following items:
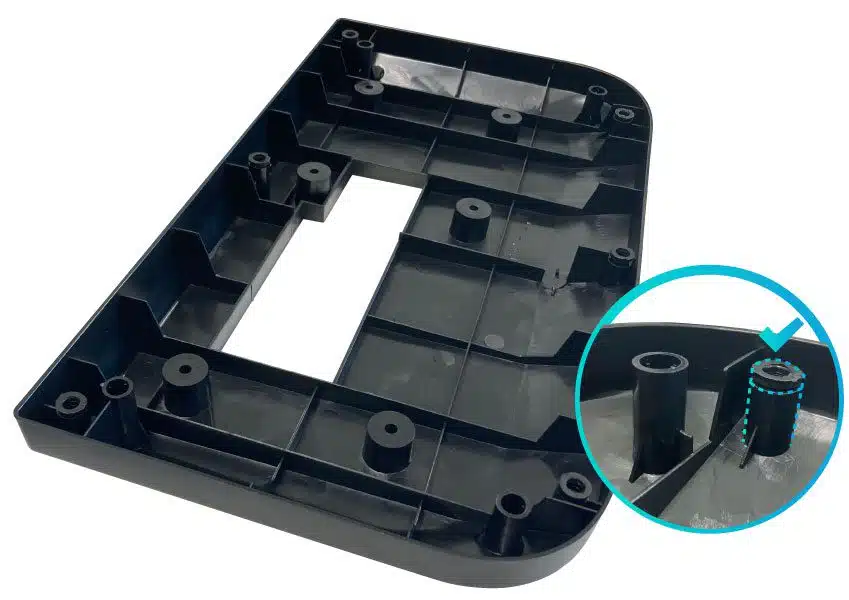
The wheels use a push-lock mechanism, and you will not need a screwdriver to install the wheels.
To install the wheels, simply insert the shaft of the wheel into the predefined wheel placement stand. The predefined stands are the smaller ones identifiable by the cap at the top (pictured).
If you find the wheels are tight or hard to install, try adding some vegetable oil or Vaseline to the shaft of the wheels. Make sure the wheels are pushed all the way in (note; the wheels are slightly elevated from the base for clearance, a small gap is normal).
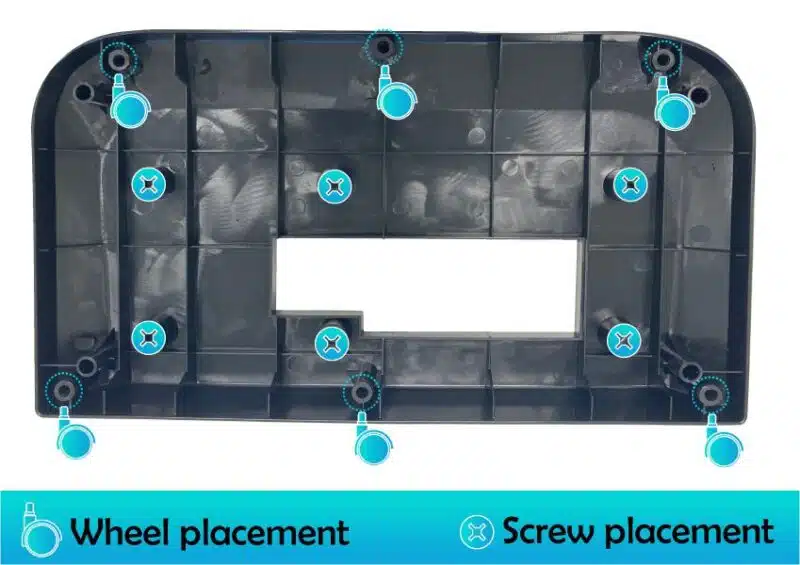
Phillips-head screwdriver required.
When observing the base plate, you will notice a slightly curved section, this faces the front of the unit.
- Place the base (with attached wheels) on the ground and carefully line up the Maestro unit.
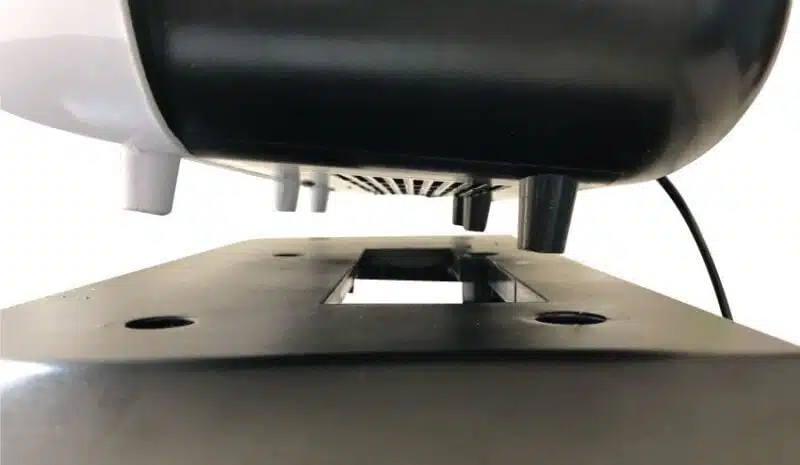
- Slowly lower the unit onto the base, aligning the pegs and holes.
- Once secured, hold both the base and the unit and tilt the unit onto its back. Add the screws and tighten until they are flush with the base – this will ensure the most secure fit and prevent wobbling and rattling due to vibration.
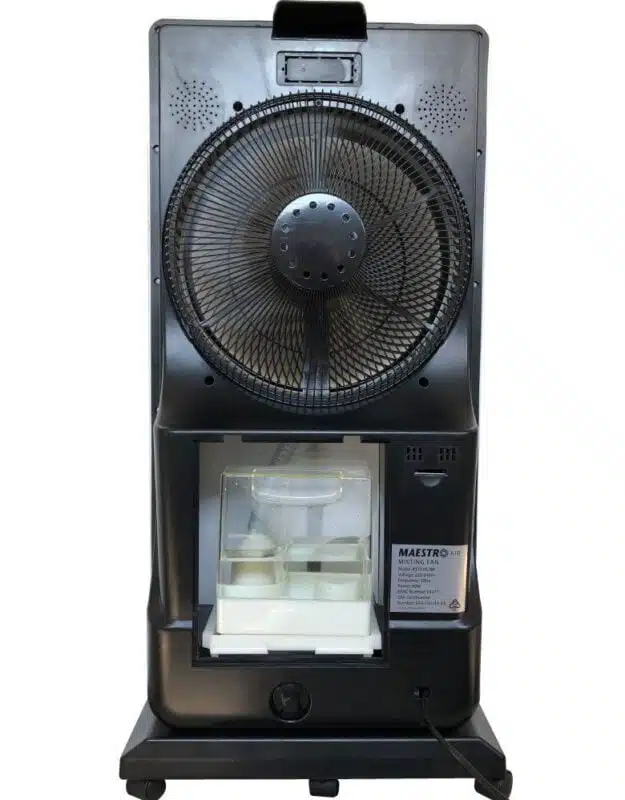
Some helpful hints and tips.
NOTE: Don’t worry about water pooling into the cream coloured bottom tray; this is how the unit functions. Water will flow from the clear water container into the cream coloured bottom tray (but will not overflow as water will only be released if the levels are not high enough) – this is where the unit grabs the water and transfers it into the atomiser.
Even when the clear water container is empty you may find water in the cream coloured bottom tray. If you wish to remove this water, you can do so by unscrewing the release cap at the back of the unit. This will empty the remaining water located in the cream coloured bottom tray (be sure to do this outside or in the bathroom).
Getting the mist function operational.
To get the mist function operational, you will need to make sure the internal hose is attached to the atomiser and that the clear water container is filled with water and installed.
- Unclip the back plate by pressing the two top clips and pulling towards you. This will release the back covering.
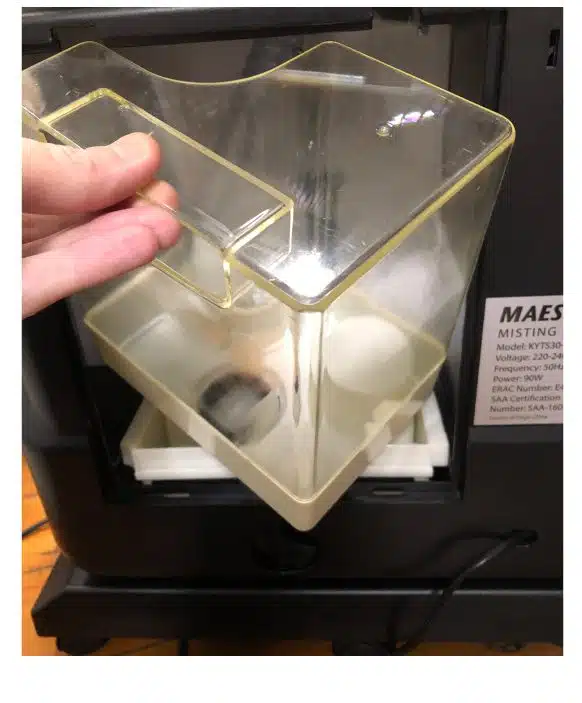
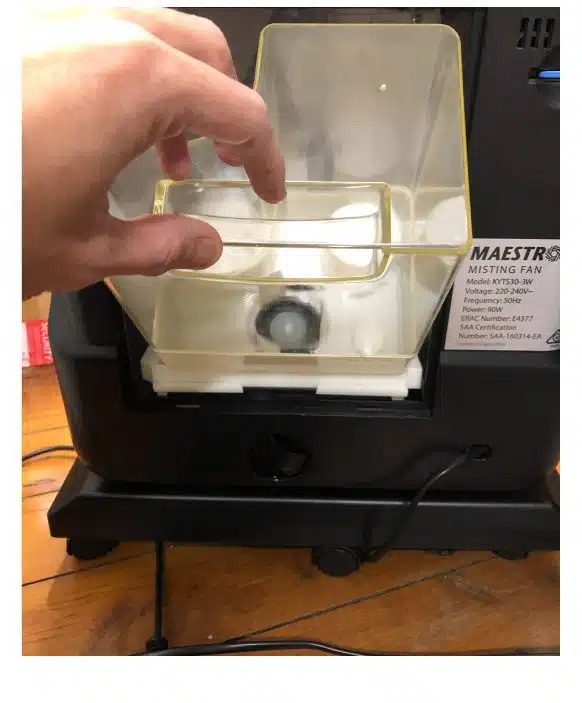
- Remove the clear water container (including the black cap) from the unit. HINT: When the container is empty, it is easier to first unscrew the black cap and then remove the clear water container and black cap – this will not work if the container still has water in it. In this case, remove the clear water container and black cap as one unit – as per normal.
- Once the container is removed, make sure the internal hose is connected to the misting atomising unit by pushing the tube onto the top of the atomiser.
- Make sure the drainage cap/bung is tightened at the back of the unit.
- If you haven’t already done so, remove the black cap from the clear water container and fill with water (you don’t need to completely fill the clear water container in order for it to work).
- Once filled, screw back in the black plastic cap.
- Orientate the clear water tank with the internal layout of the misting fan, so that the curved cut-out section is in alignment with the misting atomiser and the concave cylindrical section matches the raised cylindrical section inside the unit. Simply re-install the clear water container into the unit.
- Re-attach the back cover by placing the bottom tabs into place and then pushing in the top clips until they lock into place.
- The Maestro Air Misting Fan is now ready for use, including the mist function.
The Maestro Air misting tank holds 1.5L of water comfortably and 2L of water at maximum capacity.
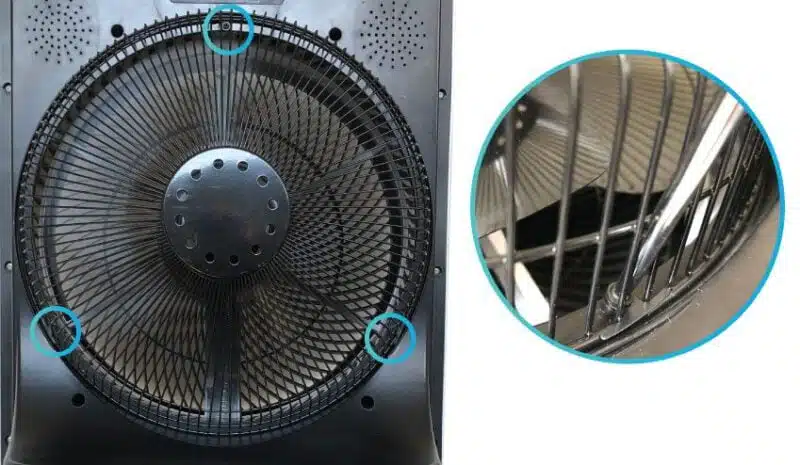
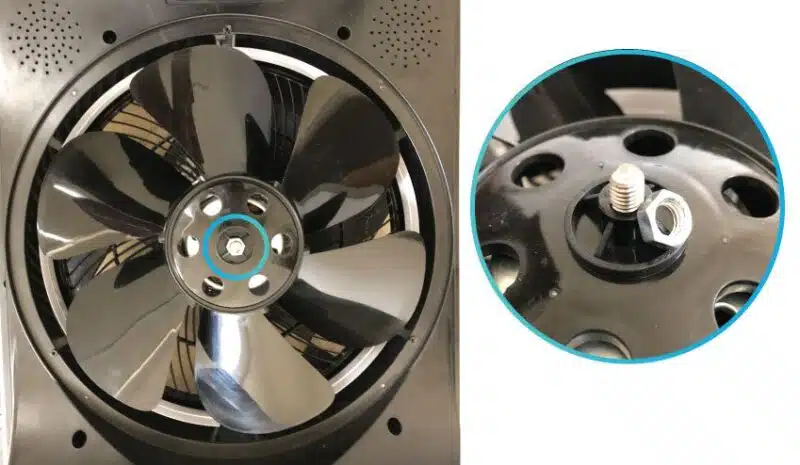
Removing the fan blades for cleaning. Phillips-head screwdriver required.
When observing the back of the unit you will notice that there is a black cage protecting the fan blades, this can be removed along with the fan blades themselves, for cleaning.
- Make sure the unit is unplugged / has no power.
- Carefully lay the unit face-down.
- Remove the 3 screws holding the cage to the unit. There is one located at the top and two located at either bottom-side of the cage.
- Once the screws are loosened, lift the cage directly upwards.
- Unscrew the nut from the threaded fan shaft. You can now remove the black fan blades for cleaning.
- Once complete return the black fan blades – NB: This will only fit one way due to the specific shape of the shaft and hole.
- Return the nut; hand tighten so that it is secure.
- Return the cage to the original position and tighten the screws.
Maestro is a pioneering leader in innovative climate control solutions. With a relentless commitment to technological advancement, Maestro has revolutionised the way we experience comfort in our surroundings. Our cutting-edge products, including state-of-the-art misting fans and cooling systems as well as dehumidifiers and other moisture removal solutions, all chemical free. Maestro is focussed on creating refreshing environments for your comfort and health.